Tuesday, December 28, 2010

A Romantic Crochet Wrist Cuff


So I found this adorable crocheted cuff pattern from an Etsy shop called Magenta Sky Studio where she offers a variety of knit and crochet items she makes as well as the pattern for this beautiful cuff so being a crocheter I bought the pattern a couple of days ago.

I used what I had available and thankfully knew where my crochet hooks were since it had been awhile and away I went...a relatively quick project. As I looked at my multi-colored creation (a litle bulkier than her delicate version), I realized it could be a fun way to enjoy wearing some of my gorgeous pins so I opted not to attach the medallion that is shown on the original pattern (though I do intend to make one like it...because I love it!) and many of you who have followed some of my posts know I love to find different ways to wear my jewelry pieces...so this may inspire you to want to make something similar. Thanks for stopping by!


I wore this vintage pin today...it's such a great Judy Lee piece!

I think the black will set off many of my pins...I'm going to get a lot of mileage out of this design!


Wednesday, December 1, 2010

BYOB Project - Construction Details


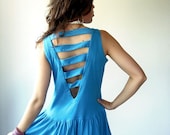
I meant to do this sooner, but just been hammered this past month so finally here are some additional ideas and suggestions related to the BYOB project converting t-shirts into usable bags!

First I'll show what I did with the pretty blue bag featured in the earlier post.

To create the curve, I folded the shirt in half and used the pins to help determine the curve...of course it could just be sewn straight across. A reminder...you must use your STRETCH STITCH to ensure the bag will stand up to the wear and tear of heavy objects.

I used a white bar of soap (courtesy of a motel stay!) which makes it easy to see on darker fabric and it will wash out, too! So, after marking both sides you can unpin and sew...I also used a decorative stretch stitch just for fun.


To cut the collar and widen the top opening I used a plate as a template...depending on the size of the shirt you may need to vary the size...pan lids would work great, too!

I uaed my pinking shears to cut through the sleeve leaving about 2 inches attached at the top so I can add a key clip and a place to hang my recycled tie cell phone holder. If you don't want to do that you can just cut off both sleeves.

The piece I've cut out I use to create a tie at the top of each sleeve to gather and hold them together.


I cut off the other sleeve completely.

I used my trusty bar of soap to mark off about one inch fringe strips.

I folded the shirt in half again and put a marker on my scissors and did some decorative slits in the main body of the shirt (which I later used for my ribbon assortment!

I even used the collar by fringing it (I eyeballed it) and decided it might be just the right size to put over a small lamp shade and realized it was a great place to hang my fishhook earrings...bonus! It would also be an adorable necklace for a little girl...you could even add some pony beads.


I have provided a pdf file with instructions to create a flat bottom bag, too, click here to get it and quick reminders on the details shown in this post...have fun and remember, Reduce, Reuse, Recycle!

Monday, November 22, 2010

Recycling on a whole new level!

I was inspired by an incredible and fun (and prolific) artist on Etsy named Will W. and he brings recycled things to life! You will have fun and be inspired by visiting his Etsy shop called Reclaim2Fame.

His work inspired me to do a very different recyclying project from the previous ones posted here...enjoy and be inspired! I've named her Rosie.

Some of the items include brass candlesticks, an exotic wood yoyo made by husband which he graciously donated to a higher cause, a vintage brooch and tin and miscellaneous beads and jewelry parts...it's a little girly compared to the shop that inspired me but you get the basic idea of giving these items a new lease on life, things that would otherwise be subjugated to a lonely separate life in a box or drawer now proudly stand as one!


Tuesday, November 16, 2010

The BYOB Project

Photobucket

I was asked to participate in a local 3R's Fair - Reduce, Reuse, Recycle which is something I love to do anyway so I wanted to present a project that might be fun and interesting and practical, too. So I found a great idea for recycling t-shirts into functional bags...I have a link on our website where you can download a pdf file with some idea reminders that I will also show in this post.

There are a number of variations with this project and it can be very simple and basic or more fussy...it's up to you! I'll show you some of the things I've done with one of my favorite t-shirt bags!

With this shirt, I opted to add a fringe and some horizontal cuts in the main part of the bag which is fun and funky as long as you aren't carrying a lot of cereal boxes but wouldn't it be great for ribbons?!


Detailed instructions to come...
Photobucket

Wednesday, November 3, 2010

Be careful what you ask for...


Ask and you shall receive...and receive I did! I was one of the few people in this world who would actually ASK for zucchini and large ones at that (most people lock their cars for fear it might show up!) Anyway, I got several donations and have done a variety of things with them that have been tasty options but thought I'd share one we have really enjoyed and that was juicing the zucchini. Paired with a couple of Granny Smith apples it was delicious. One person thought it tasted like Jolly Rancher Green Apple candy...so if you are feeling adventurous, you might want to try it! What a great use for something that might otherwise not get used...I'm going to try using the leftover pulp for bread instead of the usual grated zucchini. Isn't the color wonderful? Thanks for stopping by!